Drywall is tough stuff, but it’s not indestructible. A little drywall compound can fix minor blemishes like nail holes and dents.
However, cracks that exceed 1/8″ indicate a more serious problem and may require professional help. If you need experience, ask for references and a portfolio of previous work. Contact Drywall Repair Las Vegas now!
Cracks in drywall are unsightly and can detract from a room’s appearance. In some cases, they can even indicate underlying structural problems. Although it is tempting to just paint over these cracks, this is a temporary fix that will only cause the cracks to reappear in the future. The best way to repair drywall cracks is to correct the cause and secure the drywall to nearby studs.
Drywall cracks are generally caused by temperature changes, improper drywall installation, or normal wear and tear. They are typically not structurally significant unless they are large and jagged. Cracks are a common issue that can occur in any home, but it is important to understand why they happen and how to repair them properly.
When two sheets of drywall meet at an outside wall corner, they are secured together with an L-shaped metal strip called a “”corner bead””. This bead is nailed to the studs and concealed with two or three layers of joint compound. Over time, this metal can get dented and create a crack in the drywall. Corner bead can be damaged from a vacuum cleaner, a child flinging a toy or simply normal wear and tear. Most often, only a small section of the corner bead is damaged and it can be easily repaired with a little bit of drywall tape and joint compound.
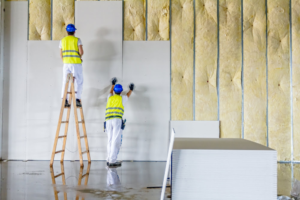
Start by using an electronic stud finder to locate the studs behind the damaged drywall. Using a drywall saw, cut away the drywall until you reach the studs on both sides of the damage. Remove the damaged drywall sections, then cut a section of new corner bead to fit the repaired area (Image 2). Use aviation snips to cut the metal corner bead and apply it to the repair site. Apply a coat of joint compound to the corner bead and smooth it out evenly, feathering the edges.
After the patch is dry, apply a second coat of joint compound and smooth it out as well. If your walls are a very light color, you may also want to apply a coat of primer to help the drywall patch blend in with the rest of the wall.
Holes
The size of the hole determines how complex a drywall repair job is. Small dents can be fixed with a small dab of touch-up paint, but as holes grow bigger, they require more work to cover up. Fixing drywall holes is something any homeowner can do. It just requires a bit of know-how and the right tools.
To repair a small hole, clean away any loose drywall debris and vacuum the area to remove any dust particles that might have settled inside. If the hole is large enough to see through to studs and electrical wiring, shut off any power to the area before beginning. You can also use a stud finder to locate the studs on either side of the damaged spot. This will prevent you from accidentally cutting into any piping or electric wires, which can be very dangerous and may require a professional to fix.
Next, purchase a drywall patch that is the same size as the hole and cut it out using a utility knife. Ensure that the drywall patch has a paper backing. Once you have the patch in place, apply a layer of joint compound over it with a putty knife. Make sure to spread the compound evenly over the entire patch, extending onto the edges. Once the first coat dries, apply a second with the same technique. Then, lightly sand the patched area to smooth it. Allow 24 hours for the sanding to be completed, then prime and repaint as needed to match the wall color.
If the hole is larger than a nickel, you will need to buy and install a new piece of drywall. Use a stud finder to locate the nearest studs on both sides of the hole and mark them before you begin. You will also want to shut off any electricity to the area to prevent accidental shocks.
Using the measurements you have made, draw a rectangular shape on a piece of paper and trim to size. Next, trace the outline of your hole on the backside of the drywall patch with a pencil. Once you have a perfect outline, snap off the extra paper from the patch and peel it back. This allows you to apply the drywall patch to the hole without any of the paper exposing. You can also cut a rectangle out of the front of the patch, if desired, to hide the edge of the drywall.
Water Damage
Water damage is a serious problem that can cause walls and ceilings to look unsightly. It can also cause drywall to collapse or develop mold problems. It’sIt’s important to address any water damage in drywall quickly and properly. If left untreated, water-damaged drywall can lead to costly home repairs and restoration costs.
One of the first things to do if you notice water damage in your drywall is to locate and fix the source of the water leak. While it might be tempting to just paint over the discoloration or water stains, it’sit’s important to find and fix the source of the water so that it doesn’tdoesn’t happen again in the future.
After you’veyou’ve fixed the source of the water, it’sit’s time to start repairing the damaged drywall. Start by removing any items that are hanging on the wall and using a utility knife to cut out the damaged area of the drywall. Be sure to wear a dust mask during this step to prevent inhaling any drywall particles or other debris. Once the area is cut out, set up fans and dehumidifiers to promote air circulation and speed up the drying process. Use a moisture meter to make sure the area is completely dry before proceeding with the repair.
If the drywall is still in good shape but has some water stains on it, you can patch the affected areas using a drywall patch kit or a piece of drywall that’sthat’s cut to size. After the patch is applied, smooth the surface of the drywall with a putty knife and feather the edges so that the patch blends into the existing wall. Once the drywall is patched and smoothed, apply several skim coats of joint compound, making each one slightly larger than the previous one. Sand the final coat of joint compound smooth with 220-grit sandpaper, and then roll on a coat of primer.
If the drywall is severely damaged or has a large amount of mold on it, it may be best to contact a professional home restorer to handle the drywall repair and replacement. Mold and mildew can be toxic to humans, and they thrive in warm, moist areas such as drywall.
Loose Tape
Loose drywall tape can lead to unattractive holes in your walls. It can also cause moisture to seep into areas where it doesn’tdoesn’t belong and create a hazard for structural problems down the line. Fixing loose tape is relatively easy, but it does require more than a little patience and a few extra tools. It’sIt’s best to tackle this repair before the damage spreads too far.
If the tape peels away entirely and exposes a large amount of drywall mud, you may need to replace it with new tape and compound. If the peel is limited to a small area, however, you can glue it back down using a moderate amount of household glue. Be sure to follow the manufacturer’smanufacturer’s instructions for applying and holding the glue.
To repair a peeling seam, first wipe the affected area clean to remove any dirt or debris that might have accumulated in the gap. Next, re-wet the tape and apply a thin coat of drywall compound to it. Use a wide knife to cover the entire length of the tape, smoothing out any bumps and ridges as you go. Let it dry, then apply a second and third coat to further smooth and blend the repaired area into the existing wall surface. Before the last coat dries, lightly sand it with 100-grit sandpaper to remove any remaining ridges and bumps. After that, prime and repaint the area to match the color of the rest of your wall.
Drywall cracks are a natural occurrence in homes that have settled over time, but they can make a house look unsightly and are often accompanied by drywall tape that cracks or even peels off the wall. This type of damage is usually fairly minor, but if left alone, can cause further structural issues in the future and expose the home to water or insects.
Purchase a tub of drywall compound and a roll of self-adhesive paper tape at your local hardware store. It is available in a variety of sizes, so choose the one that matches your wall thickness. If possible, buy a gallon of 20-minute setting compound, which hardens quickly and won’twon’t shrink, so you can work with it in a hurry.